Secure AI Database Access: Exograph now supports MCP

Exograph now enables you to create secure, flexible, and performant MCP servers for your Postgres database. Define your domain model, add access control rules, deploy to the cloud, and you're off to the races!
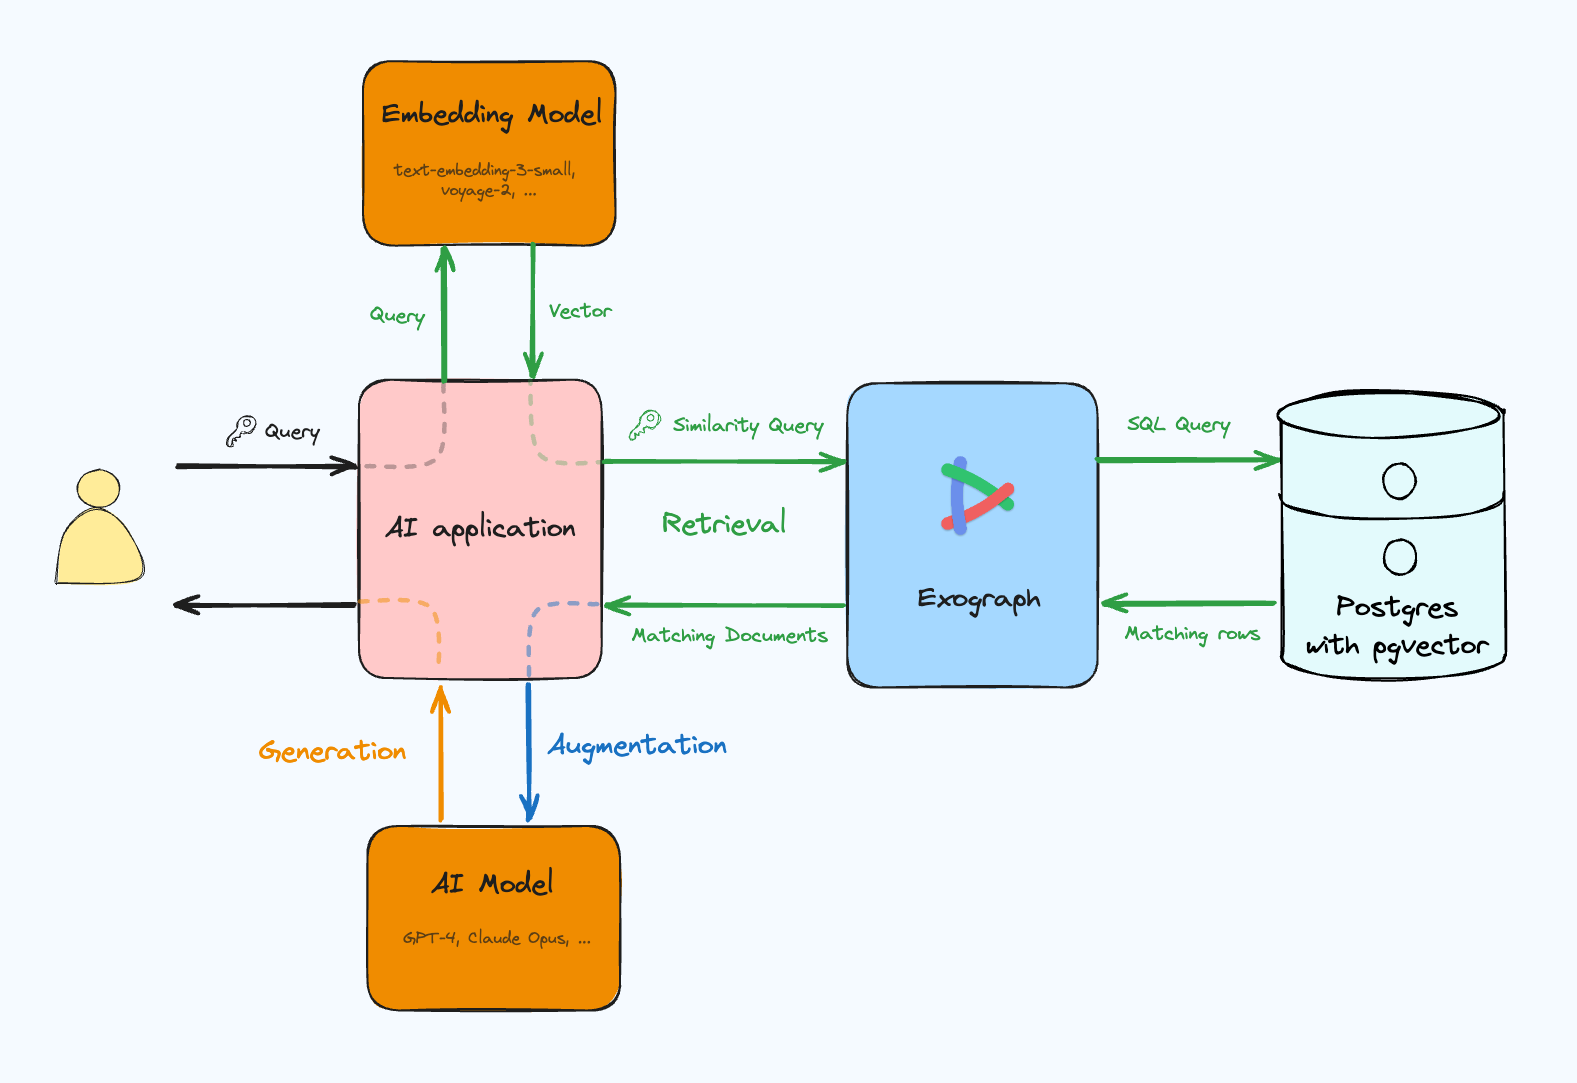
MCP provides AI applications with custom data via a standard protocol. This is good because it gives LLMs the ability to get relevant context to provide better responses. However, it presents engineering challenges to ensure that even if LLMs inadvertently send wrong queries, the server never returns data that the user isn't authorized to see.
One of the common sources of information is databases, and this is where things get complex. LLMs perform best with rich, cross-table data that requires sophisticated SQL queries. But the server must ensure it never returns data the user isn't authorized to see. Writing SQL queries to consider both these aspects is challenging. These queries are hard to write, harder to optimize, and difficult to test across different authentication scenarios. You might be tempted to let the LLM form the query and use Row-Level Security (RLS) to deal with access control, but it is quite difficult to implement correctly.
Exograph's MCP support lets you focus on your domain model and access control, rather than testing ad-hoc queries and setting up custom plumbing. It acts as an intelligent proxy that offers LLMs access to comprehensive data in fewer roundtrips while ensuring that LLMs never see data that they aren't meant to.