Setting up
Let's set up Exograph and create a simple application to ensure everything works as expected.
Installing Exograph
- Mac and Linux
- Windows
curl -fsSL https://raw.githubusercontent.com/exograph/exograph/main/installer/install.sh | sh
irm https://raw.githubusercontent.com/exograph/exograph/main/installer/install.ps1 | iex
An alternative to installing Exograph directly on your machine is to use Docker. See the Docker guide for more information.
Also install either Postgres or Docker. One of these is required to use the yolo mode during development.
Installing the VS Code extension
Click here to install the Exograph VS Code extension.
Creating a simple application
Let's create a simple application to get a taste of working with Exograph. Later, we will develop a more fully featured application with access control, performance monitoring, and more.
Creating the model
We will follow the well-worn tradition and create an API server for a Todo app.
Execute the following command:
exo new todo-app
This command will create a new directory named todo-app with the following structure:
todo-app
├── src
│   └── index.exo
├── tests
│   ├── basic-query.exotest
│   └── init.gql
├── .gitignore
Now change into the todo-app directory and check the contents of the index.exo file:
cd todo-app
cat src/index.exo
You will see the following (to see syntax highlighting, open the file in VS Code after installing the Exograph VS Code Extension):
@postgres
module TodoDatabase {
  @access(true)
  type Todo {
    @pk id: Int = autoIncrement()
    title: String
    completed: Boolean
  }
}
Launching the server
Now we can launch the server.
exo yolo
The yolo mode is a simple way to start the server during development without requiring a database. Exograph will create a temporary database in this mode and apply migrations whenever the model changes.
You should see the output in the console that the server is running.
Launching PostgreSQL locally...
Watching the src directory for changes...
Starting with a temporary database (will be wiped out when the server exits)...
Postgres URL: postgres://exo@%2Fvar%2Ffolders%2F8g%2Fttrcklpj7879w6fbk26dgrbh0000gn%2FT%2F.tmpcYt5yp/yolo
Generated JWT secret: c1d22ndtjjxlxni
Applying migrations...
Started server on localhost:9876 in 6.14 ms
- GraphQL endpoint hosted at:
        http://localhost:9876/graphql
- MCP endpoint hosted at:
        http://localhost:9876/mcp
- Playground hosted at:
        http://localhost:9876/playground
Using the GraphiQL interface
Visit the playground at http://localhost:9876/playground.

Performing GraphQL mutations
Let's create a couple of todo items.
Paste the following code in the GraphiQL interface to create a todo titled "Install". Since that task is complete, we will set the completed property to true.
mutation {
  createTodo(data: { title: "Install", completed: true }) {
    id
  }
}
And hit the "Execute Query" button. You should see the following output:
{
  "data": {
    "createTodo": {
      "id": 1
    }
  }
}
Let's create another todo titled "Create Simple App". Since we are working on that task, we will set the completed property to false. You can query back any fields you want, so let's query the title and completed fields in addition to id.
mutation {
  createTodo(data: { title: "Create Simple App", completed: false }) {
    id
    title
    completed
  }
}
You should see the following output:
{
  "data": {
    "createTodo": {
      "id": 2,
      "title": "Create Simple App",
      "completed": false
    }
  }
}
Performing GraphQL queries
Now we can query the todos.
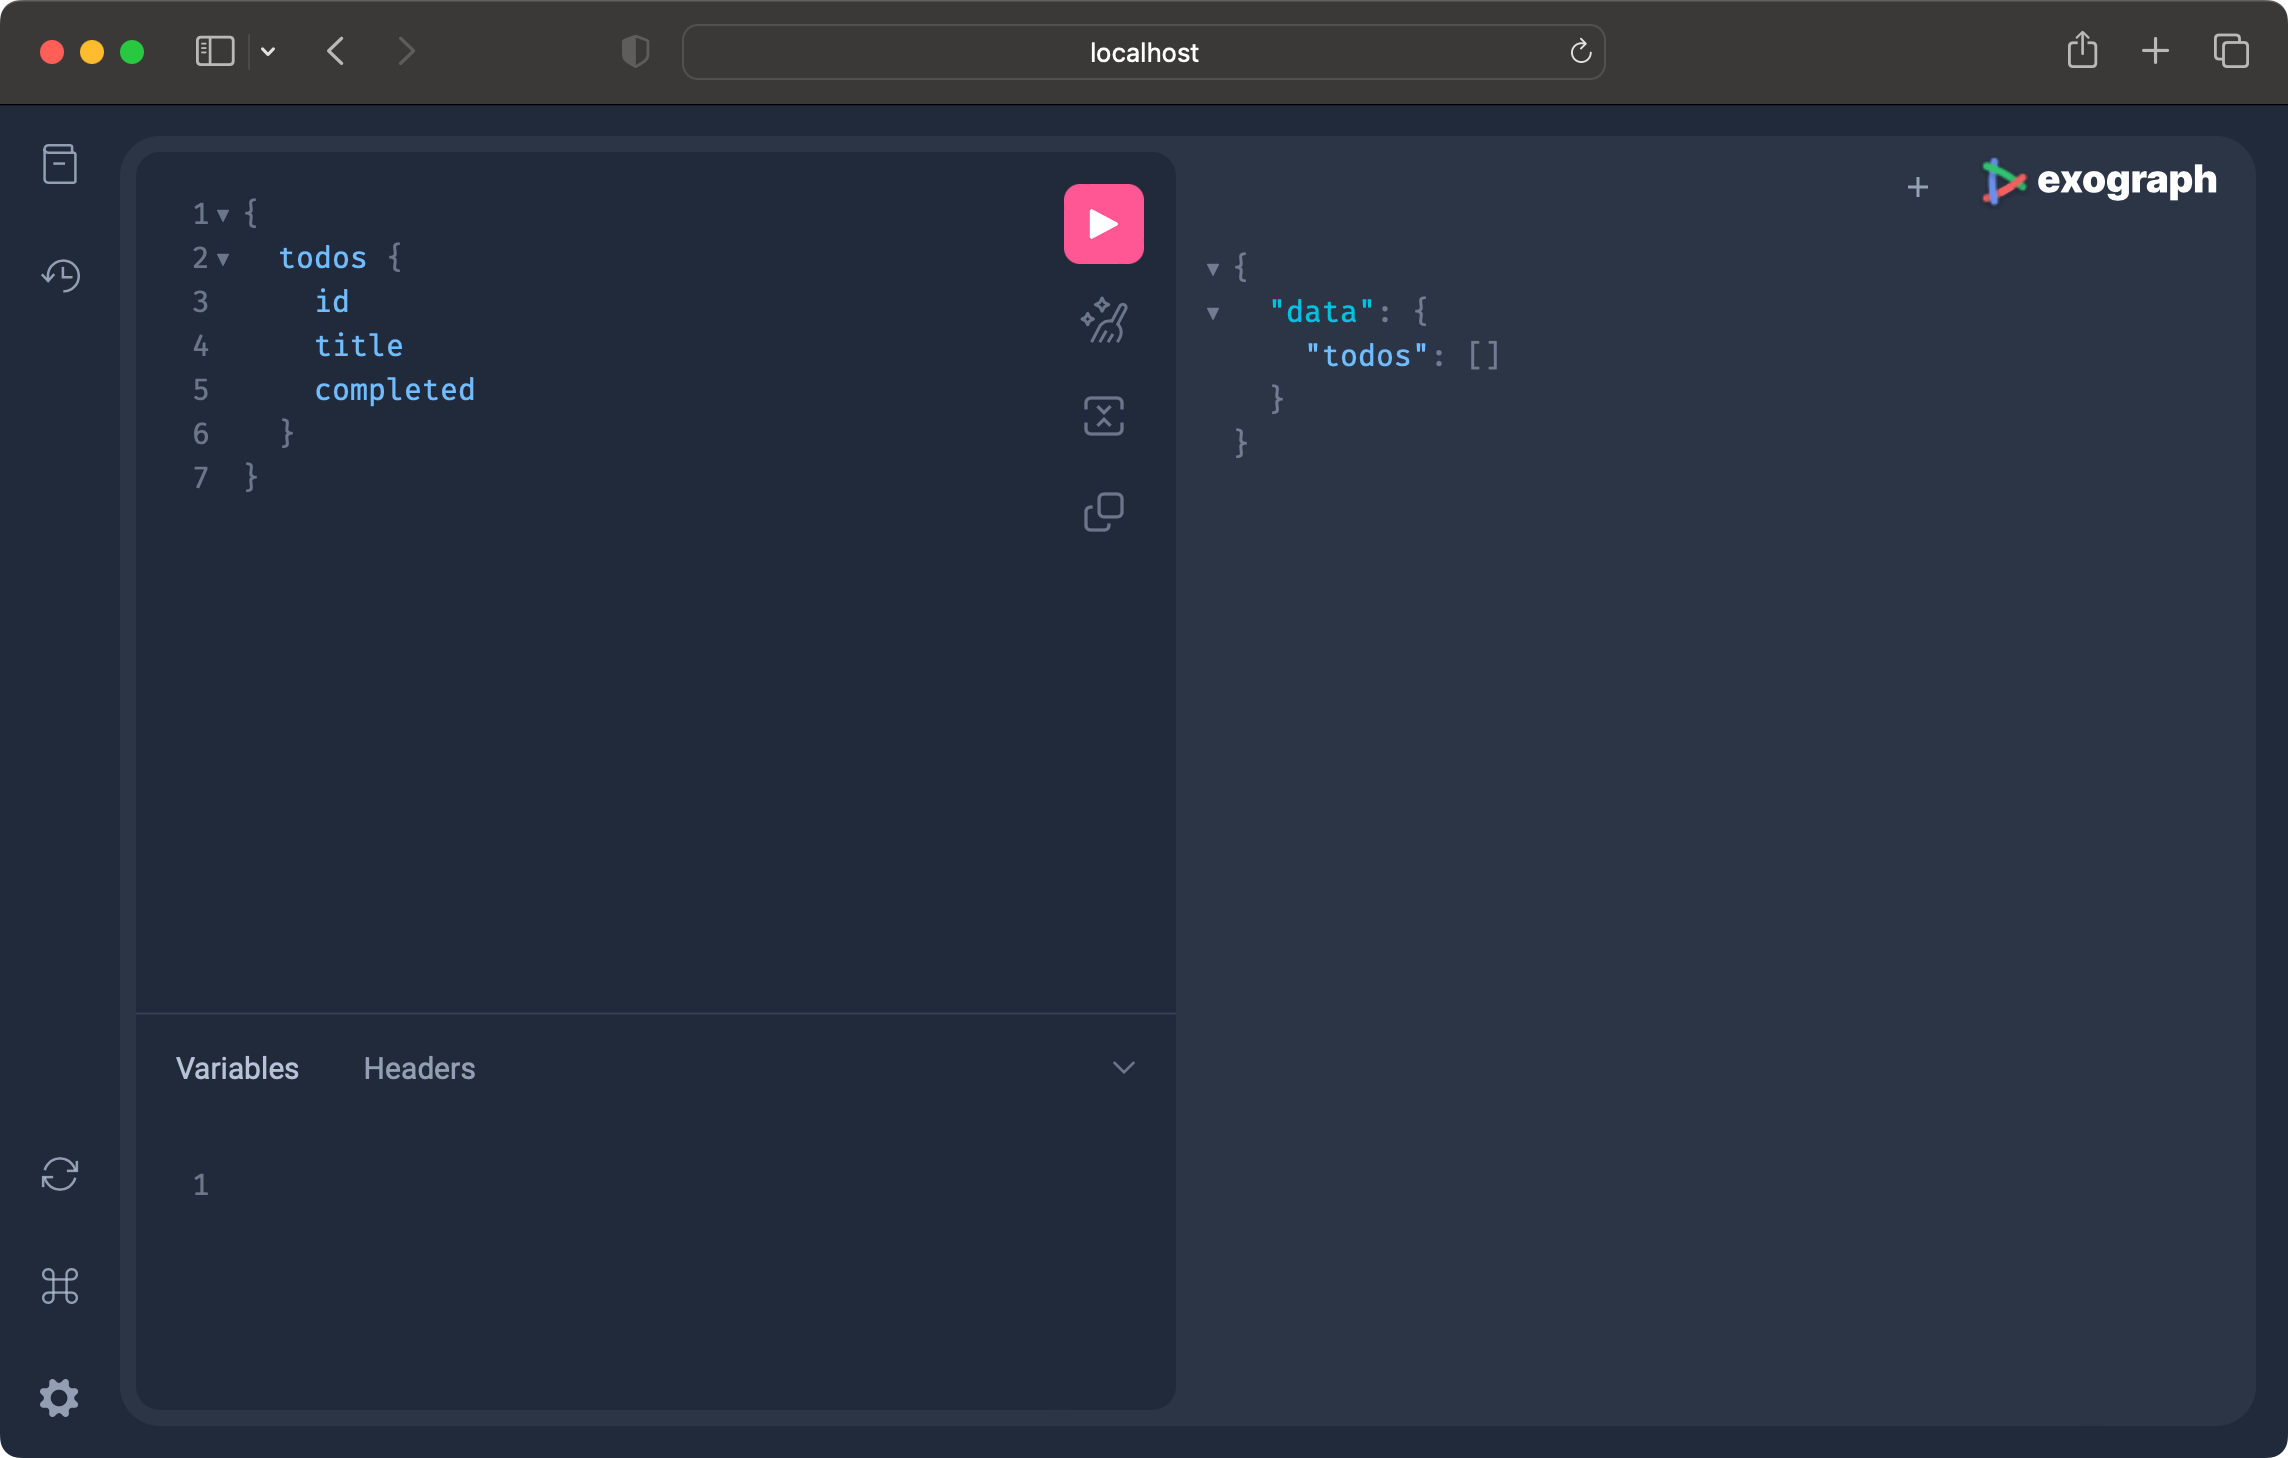
First, let's get all of the todos. Execute the following query in the GraphiQL interface:
query {
  todos {
    id
    title
    completed
  }
}
You should see the following output:
{
  "data": {
    "todos": [
      {
        "id": 1,
        "title": "Install",
        "completed": true
      },
      {
        "id": 2,
        "title": "Create Simple App",
        "completed": false
      }
    ]
  }
}
You can do much more: getting a todo by id or some filtering criteria, updating and deleting todos, etc. We will leave all those details for later.
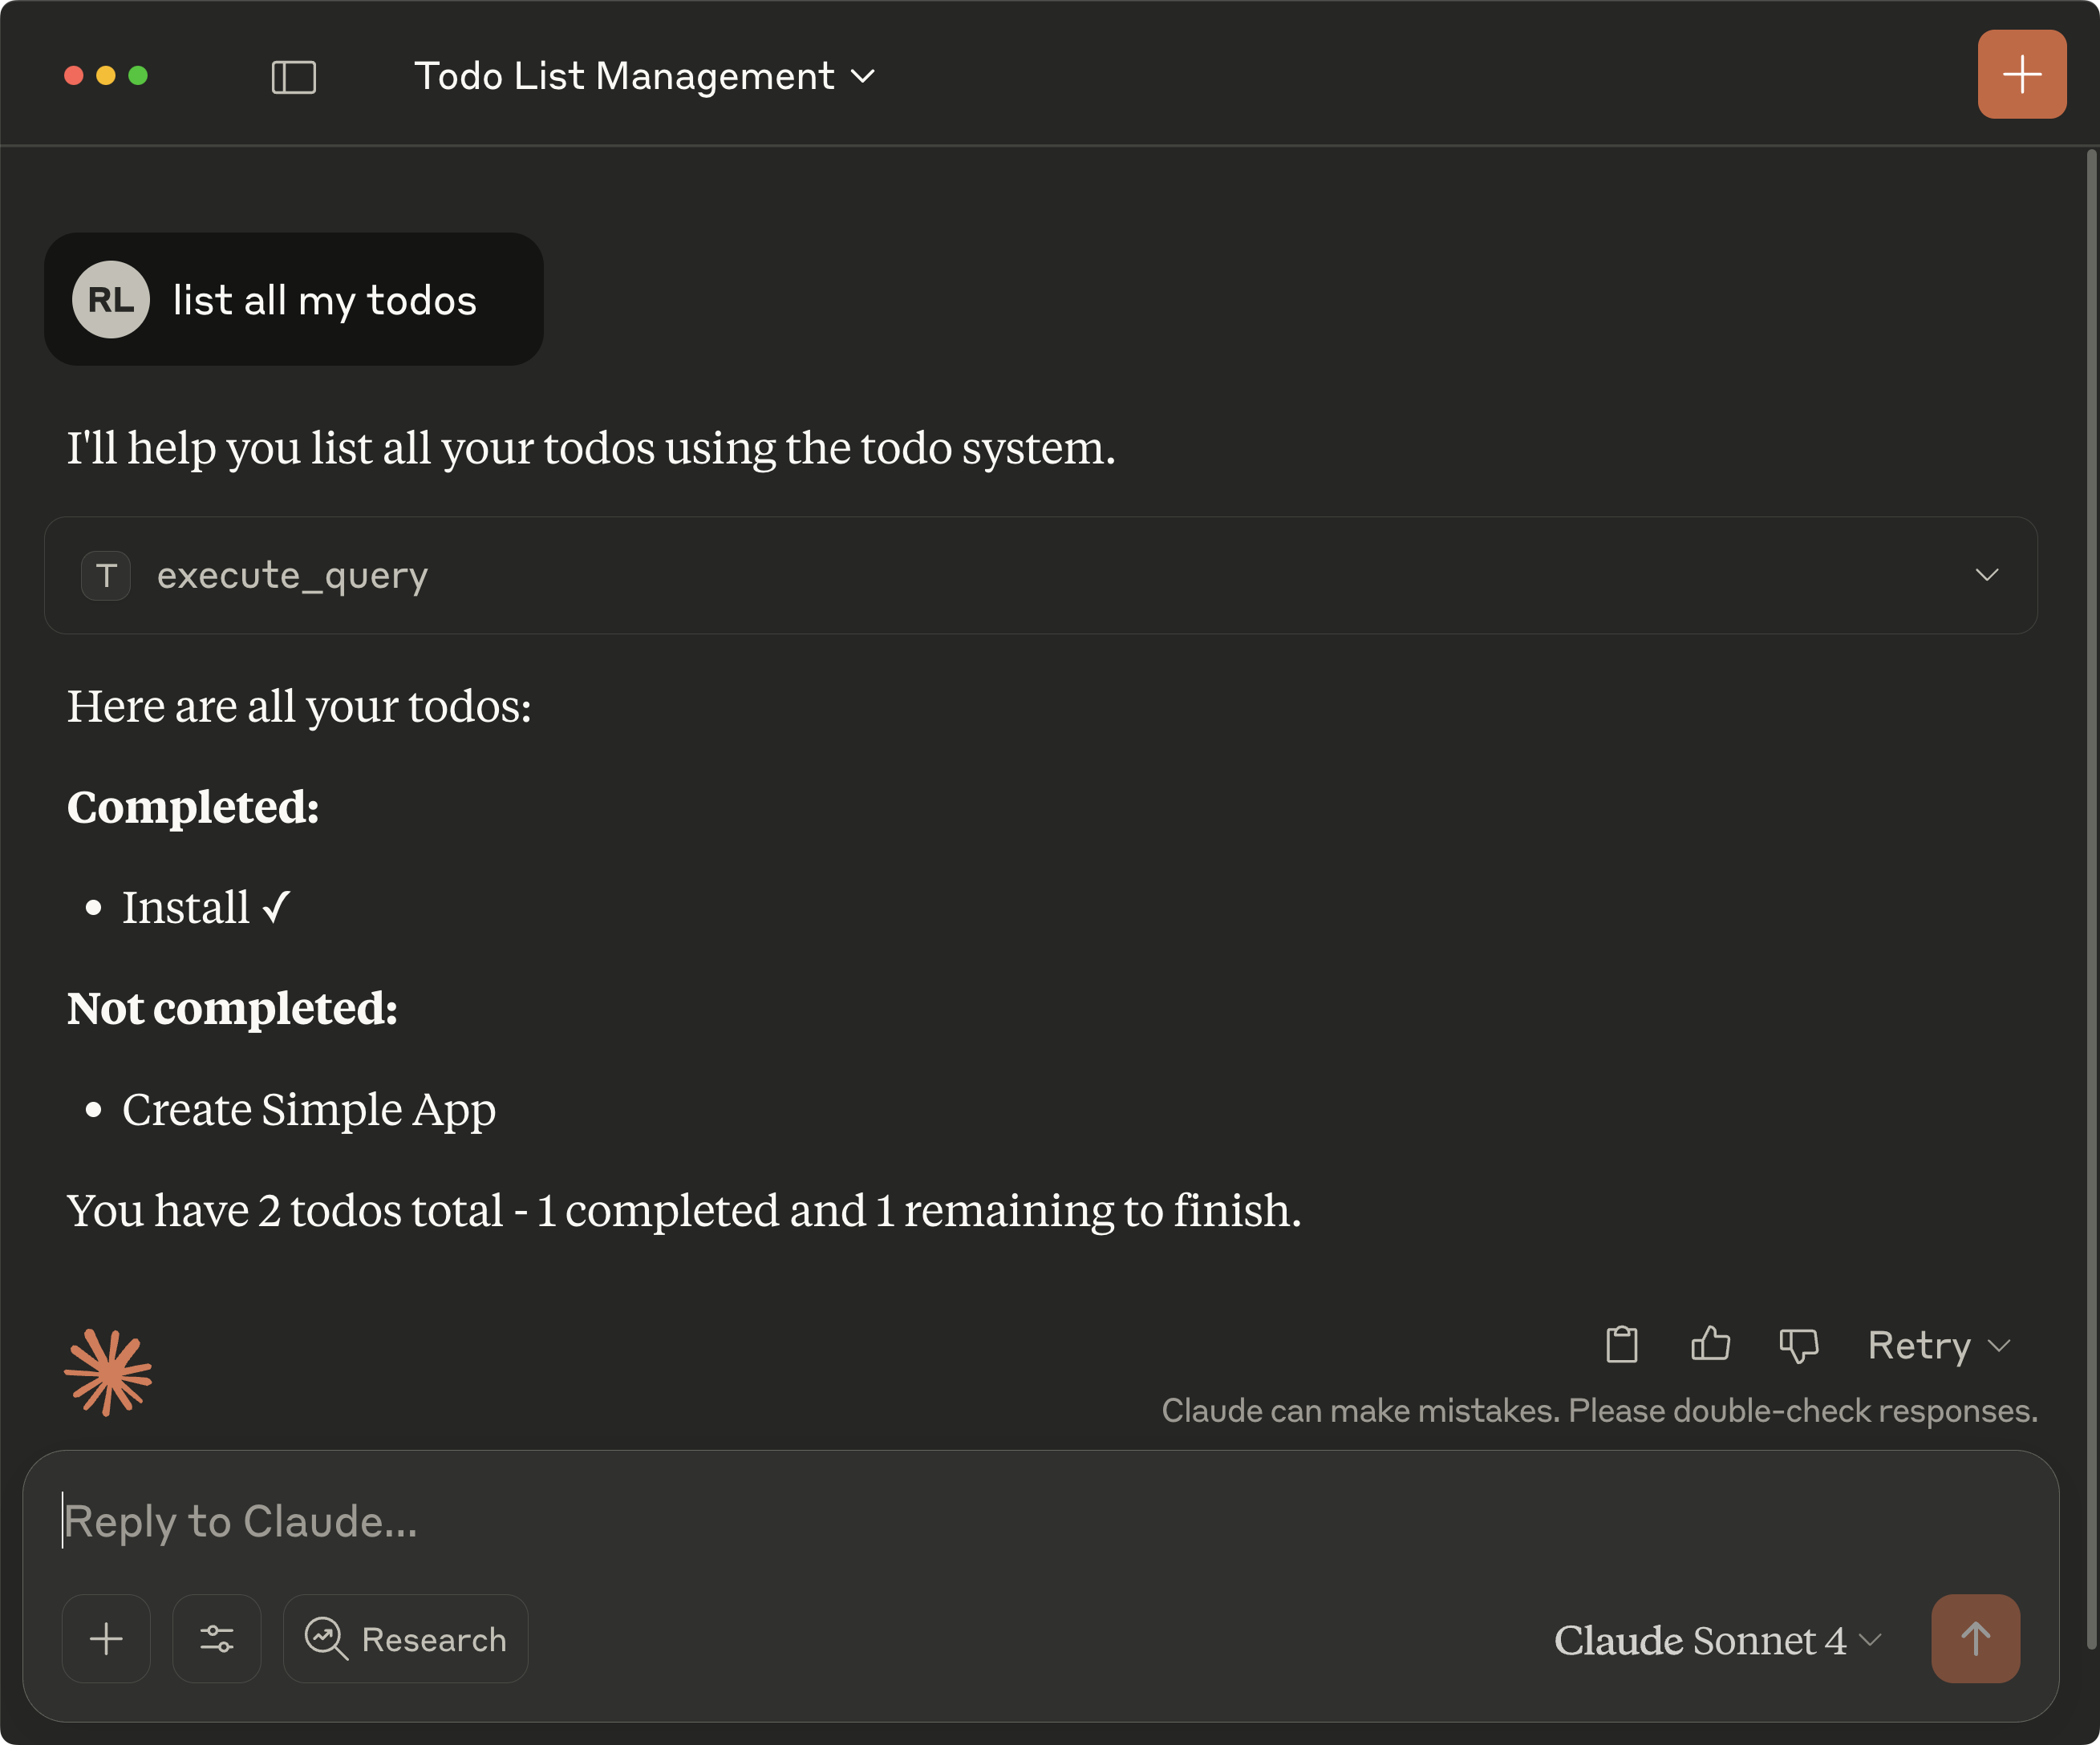
Working with LLMs using MCP
Let's connect the MCP server started by the yolo command to an LLM. We will use Claude Desktop as the MCP client.
Add the following to your Claude Desktop configuration. The specific file you need to modify depends on your operating system, so follow the instructions here.
{
  "mcpServers": {
    "todo-mcp": {
      "command": "<your-home-directory>/.exograph/bin/exo-mcp-bridge",
      "args": ["--endpoint", "http://localhost:9876/mcp"]
    }
  }
}
Now you can ask Claude Desktop questions such as "List all the todos", "List all the todos that are not completed", or "Have I completed installation?"
The MCP server offered by Exograph shows its full power with complex domain models with access control. We will cover that in the MCP tutorial.