Evolving Access Control with Exograph


Applications, like ideas, begin small and grow over time. Initially, an app might be a single-user demo for your next unicorn startup. If it resonates with your user base, the natural progression involves scaling it to accommodate multiple users. At this point, you need authentication, access control, and administrative functionality.
Adapting your domain model to new requirements is essential and Exograph provides robust support for this process. As your domain evolves, you can easily update the Exograph model to match it. As the model changes, the GraphQL API is automatically synchronized with the model. Exograph also helps manage database migrations. As changes in access control demands arise, you can easily represent them in your model. Additionally, Exograph enables declarative testing, minimizing the risk of regressions as adaptations unfold.
In this blog, we will focus on how Exograph streamlines the evolution of access control rules. We will develop a todo app from scratch starting with a single-user application with no authentication. We will then migrate it into a multi-user platform—complete with authentication and access control. We will see how Exograph makes this transition seamless.
The accompanying code (simple, with authentication) includes a frontend implemented with Next.js, Tailwind, Apollo GraphQL Client, and TypeScript.
Building the single-user version
Let's create an app with no authentication and wide-open access control. Running the following commands is all we need to create the backend:
Creating the project
mkdir todo-app
cd todo-app
exo new api
The starter code defines a single type Todo with a permissive @access(true) policy that allows anyone to query or mutate todos. This access control rule may be acceptable for a local single-user todo app, but not much beyond that. We will fix that in the next section.
@postgres
module TodoDatabase {
  @access(true)
  type Todo {
    @pk id: Int = autoIncrement()
    title: String
    completed: Boolean
  }
}
Now let's start the backend to explore the GraphQL API:
cd api
exo yolo
The server is now ready 🚀.
Exploring the API
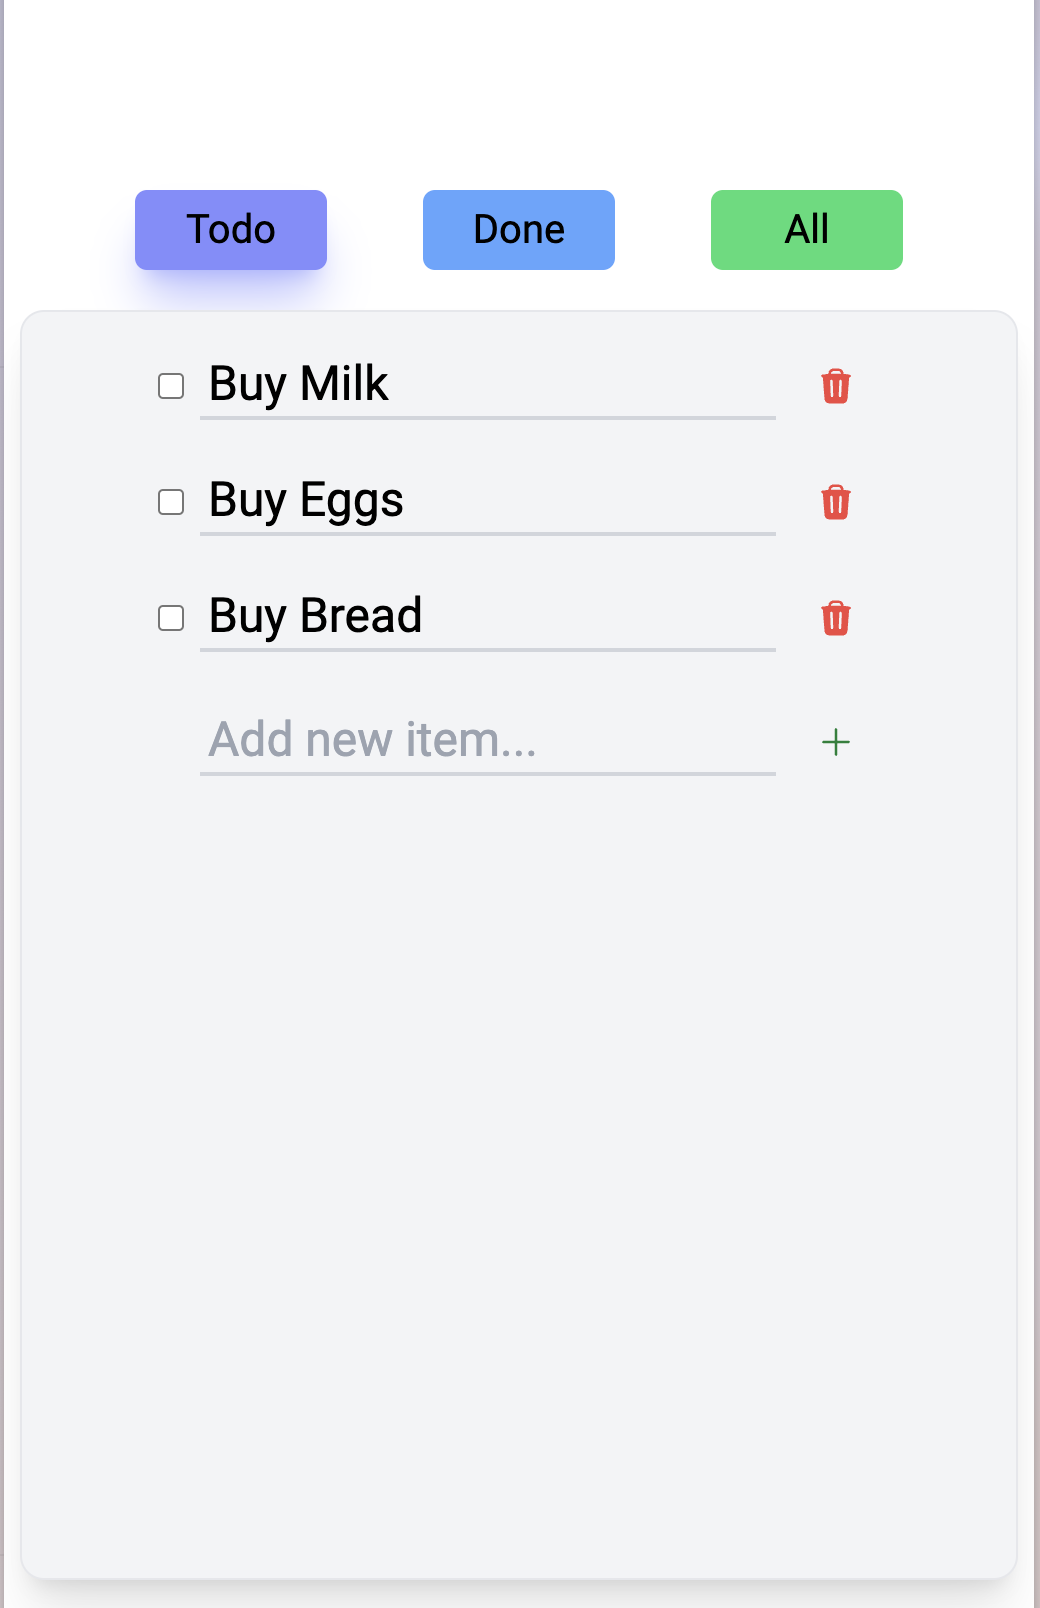
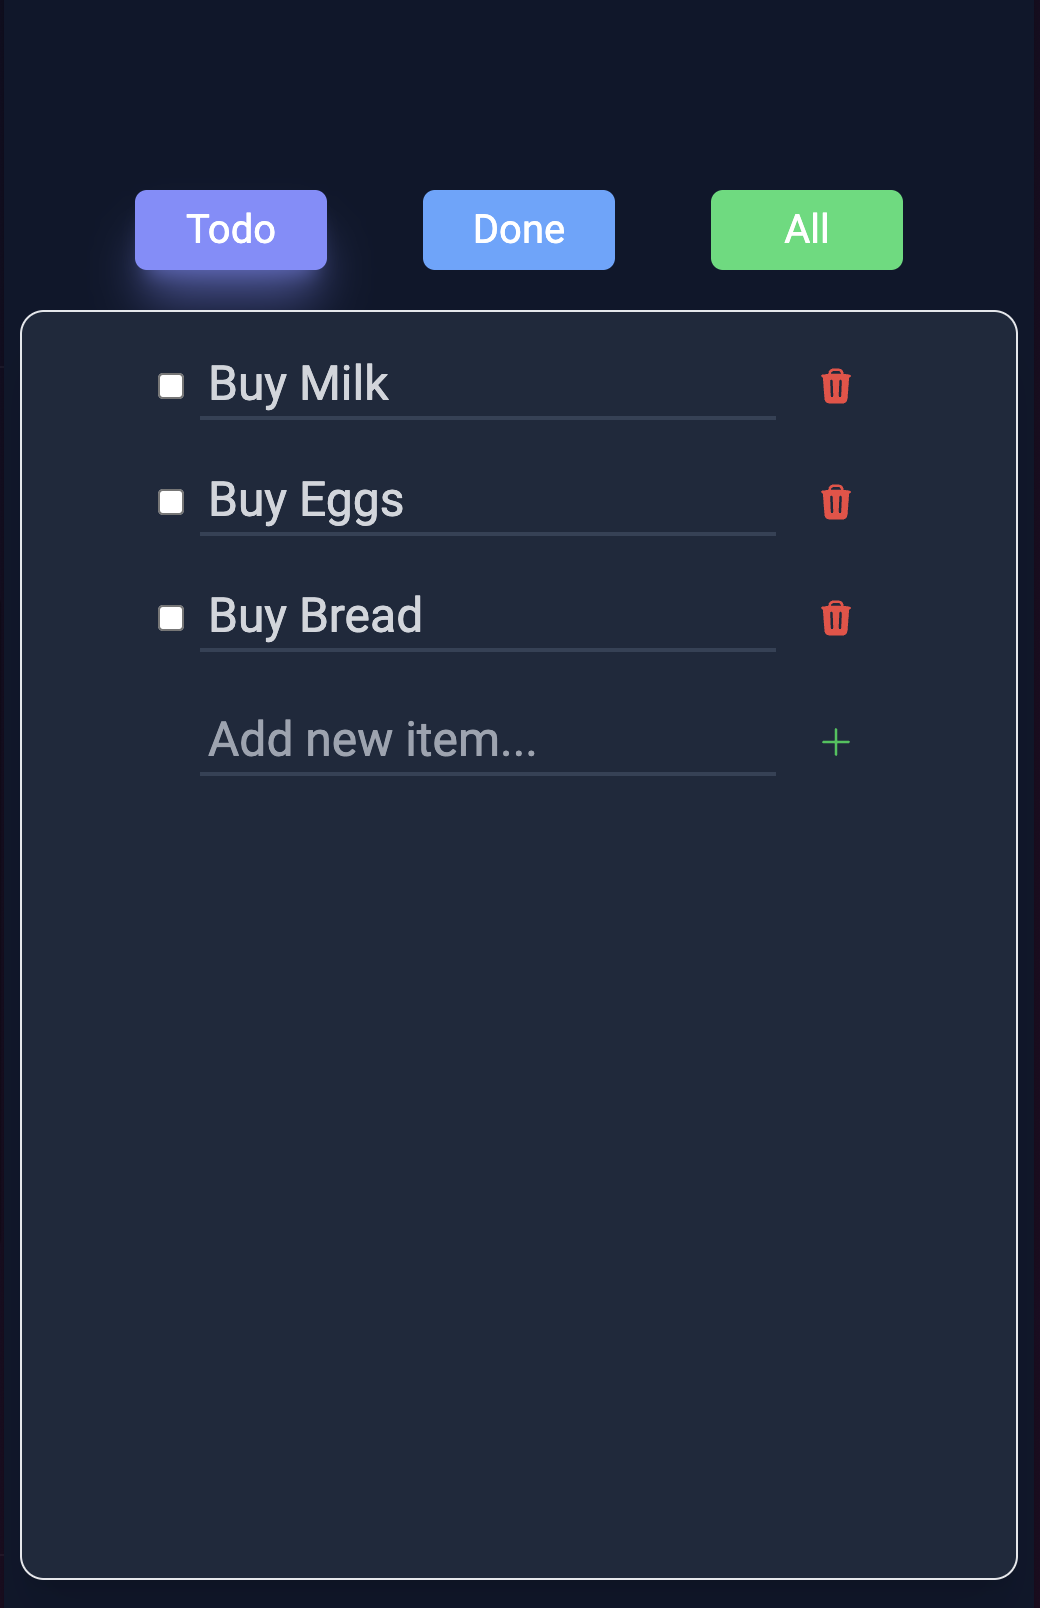
Our goal is to build a frontend that allows us to create, update, and delete todos. It also shows todos by their completion status. Let's see how we can achieve this with the GraphQL API.
Open http://localhost:9876/graphql to try the GraphQL playground.
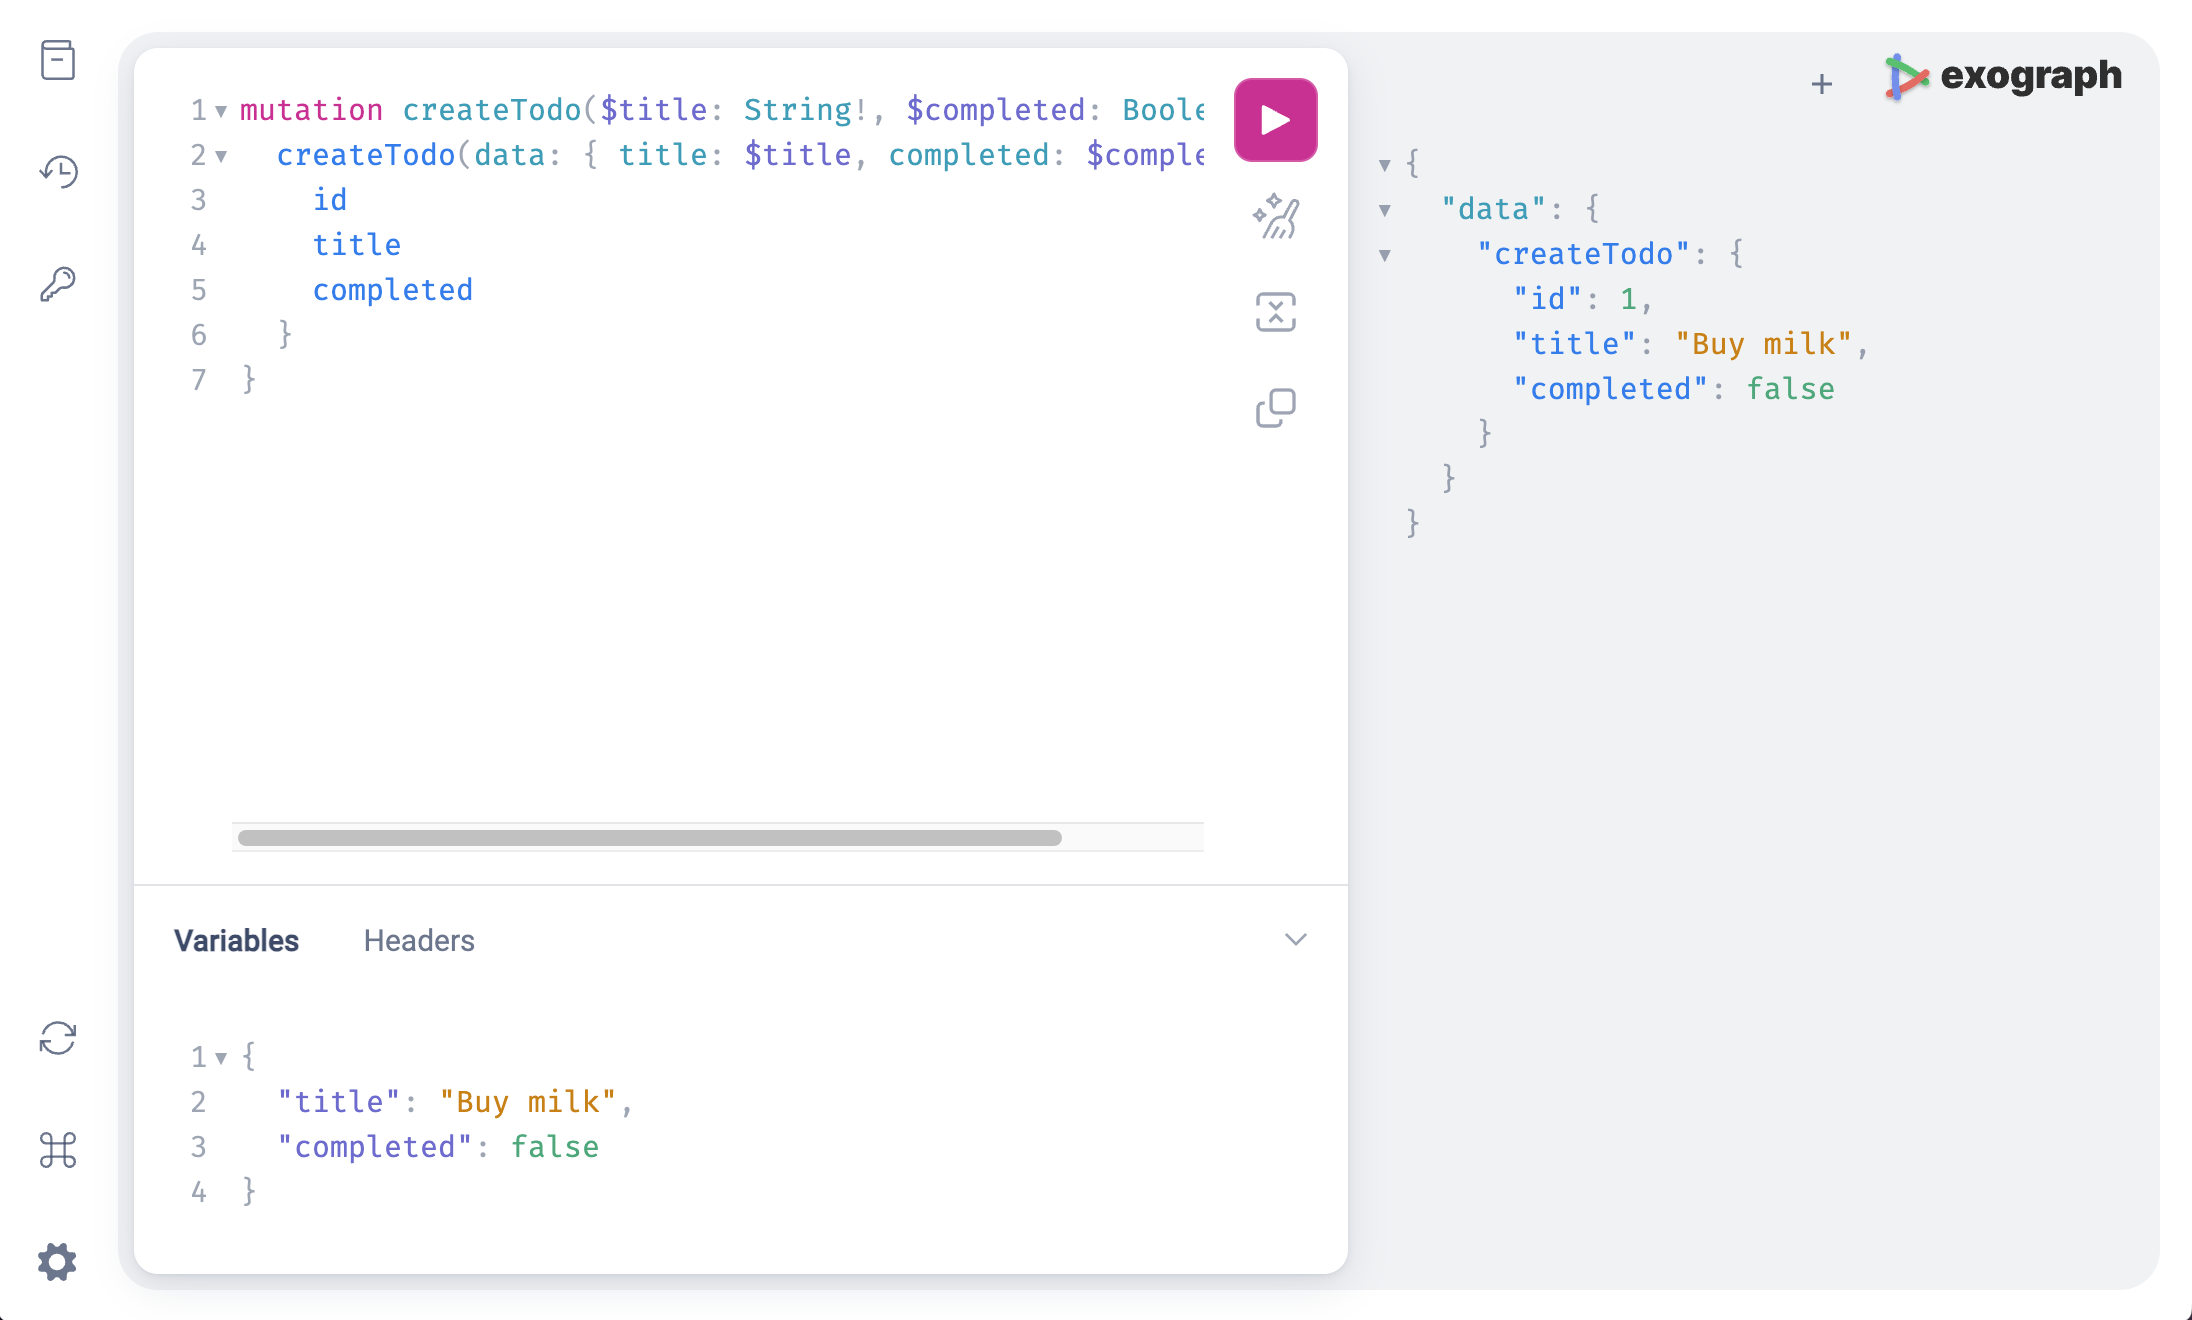
Creating todos
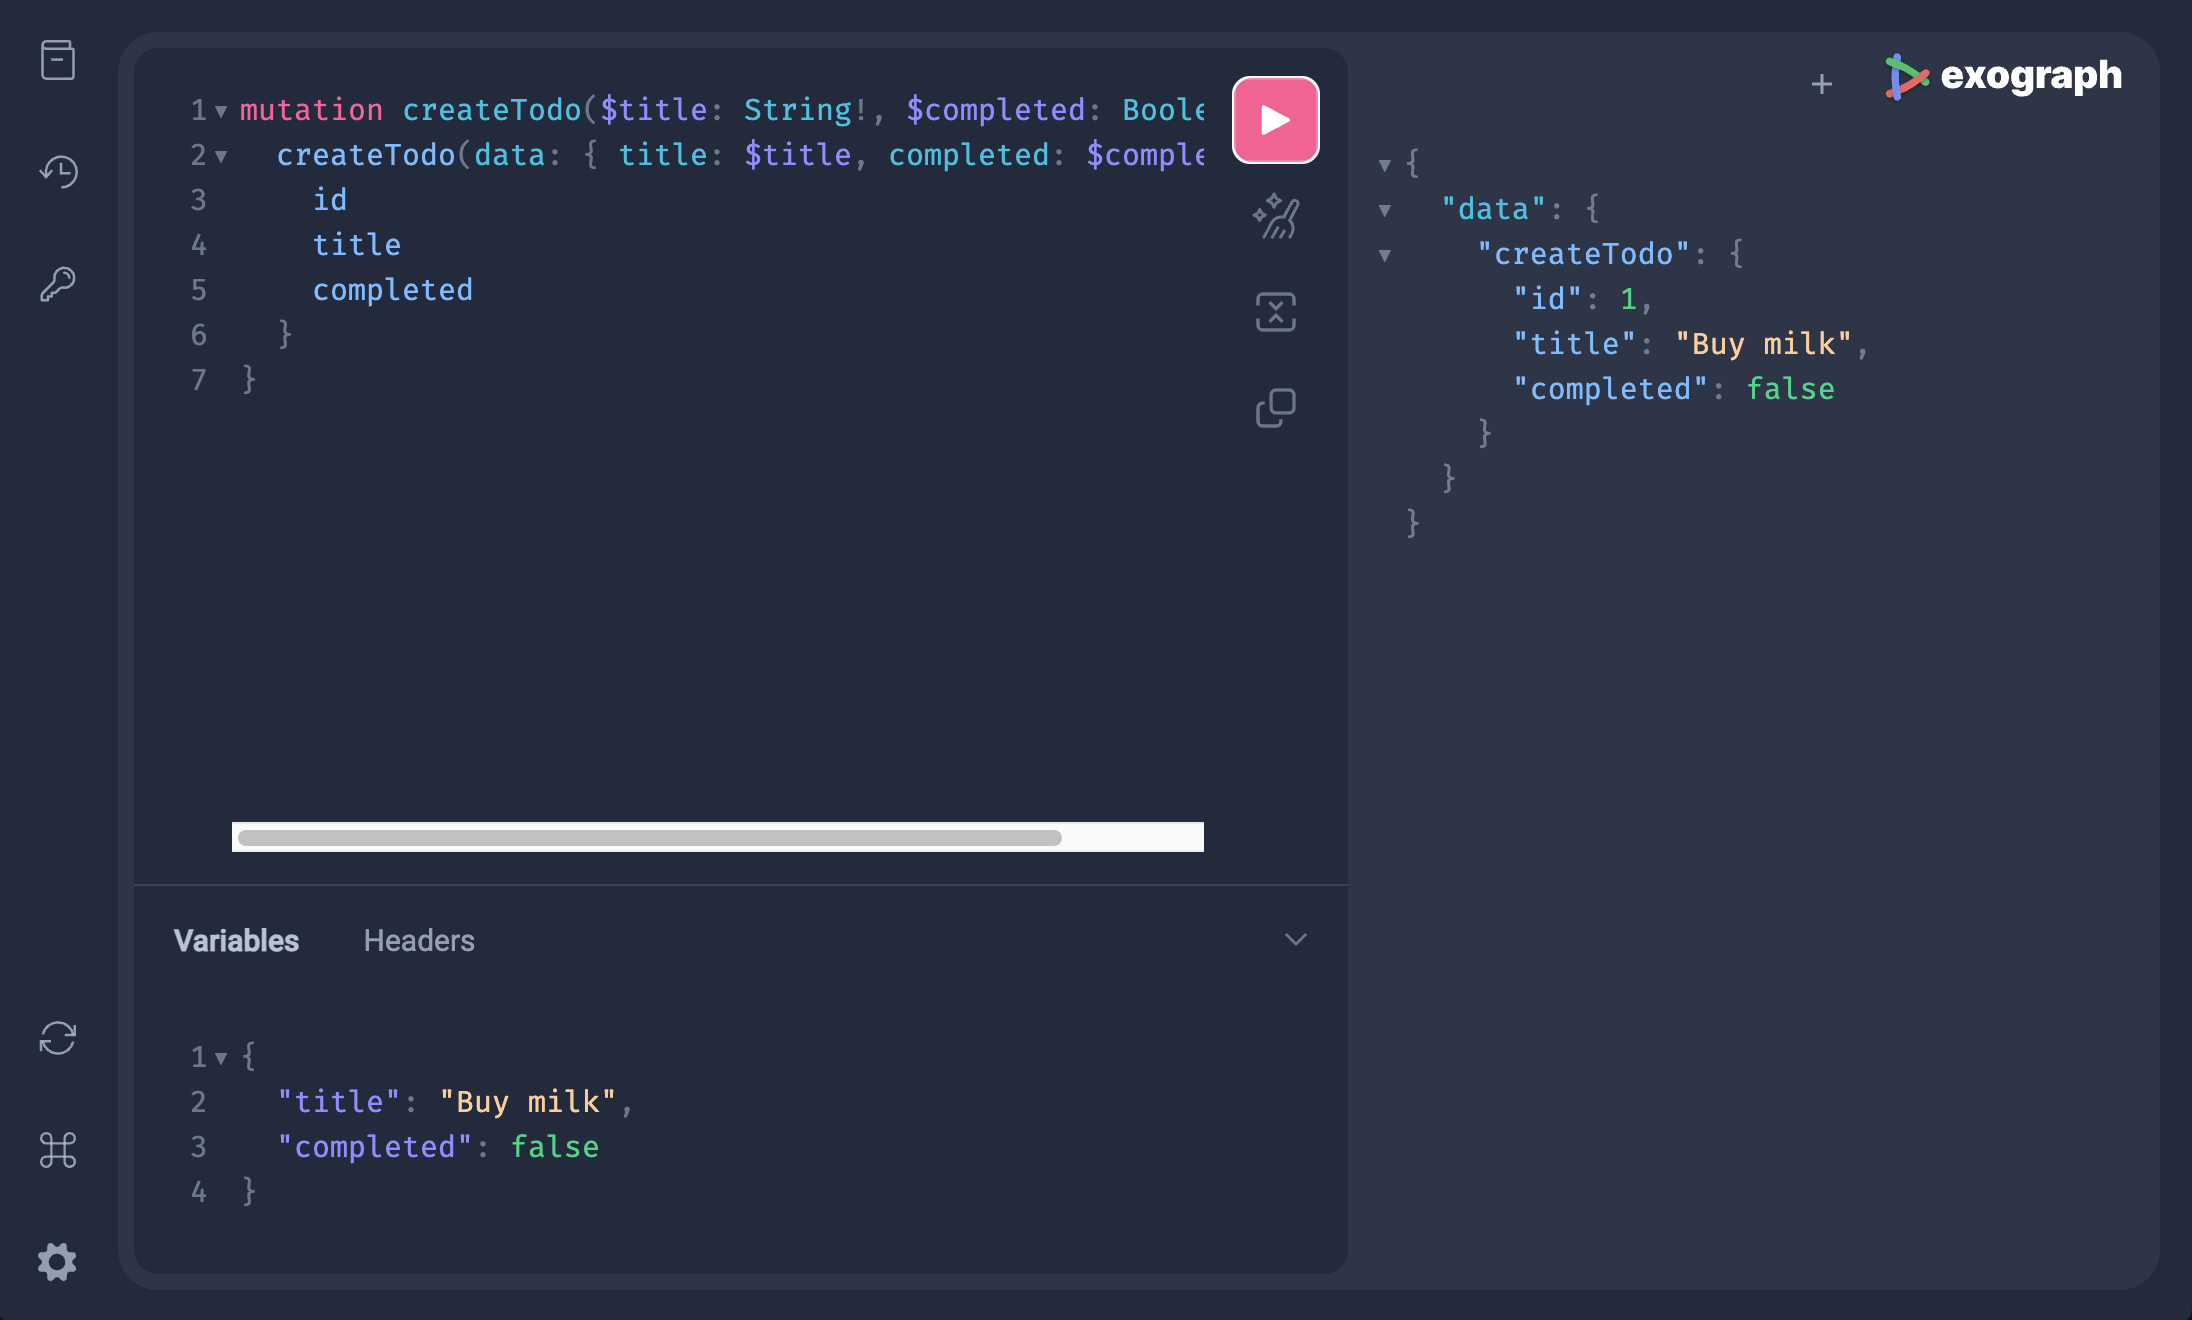
Let's create a todo. We can do that with the following mutation:
mutation createTodo($title: String!, $completed: Boolean!) {
  createTodo(data: { title: $title, completed: $completed }) {
    id
    title
    completed
  }
}
Paste the above code in the playground. In the Variables tab, add the following JSON:
{
  "title": "Buy milk",
  "completed": false
}
Now, execute the mutation by clicking on the Play button. You should see the following response:
{
  "data": {
    "createTodo": {
      "id": "1",
      "title": "Buy milk",
      "completed": false
    }
  }
}
Create a couple more todos with different titles and completion status.
Updating todos
The frontend will also need to update todos. We can achieve this through the following mutation:
mutation updateTodo($id: Int!, $title: String, $completed: Boolean) {
  updateTodo(id: $id, data: { title: $title, completed: $completed }) {
    id
    title
    completed
  }
}
Note that the id is required, but title and completed are optional (since we may want to update either). Try updating the title and completion status of a few todos.
Deleting todos
Deleting a todo is easy with the following mutation:
mutation deleteTodo($id: Int!) {
  deleteTodo(id: $id) {
    id
  }
}
Listing todos
Getting all todos is trivial:
query allTodos {
  todos {
    id
    title
    completed
  }
}
Getting todos by their completion status isn't much harder:
query todosByCompletionStatus($completed: Boolean!) {
  todos(where: { completed: { eq: $completed } }) {
    id
    title
    completed
  }
}
This is the complete set of GraphQL operations we need to build the frontend. At this point, you may want to check out the repository and run the frontend to see how it works.
Let's move on to the next section to see how to evolve this app to support multiple users.
The multi-user version
The declarative nature of Exograph makes it easy to evolve the model and access control rules as the application grows. In our application, we need to:
- Add a
Usertype and introduce a relationship betweenTodoandUser. Adding a relationship in Exograph is as easy as adding a field. - Add access control such that:
- Users can only query or mutate todos that they own. However, we will make an exception for the omnipotent admins to do anything.
- Only admins can query or mutate users.
In this blog, we do not focus on the authentication mechanism. The accompanying code, however, includes integration with Google Identity.
Updating the model
We can express the above requirements by updating the model as follows:
context AuthContext {
  @jwt("sub") id: Int
  @jwt("role") role: String
}

@postgres
module TodoDatabase {
  @access(self.user.id == AuthContext.id || AuthContext.role == "admin")
  type Todo {
    @pk id: Int = autoIncrement()
    title: String
    completed: Boolean
    user: User = AuthContext.id
  }

  @access(AuthContext.role == "admin")
  type User {
    @pk id: Int = autoIncrement()
    @unique email: String
    firstName: String
    lastName: String
    profileImageUrl: String
    role: String = "user"
    todos: Set<Todo>?
  }
}
Let's unpack the changes we have made:
- Introduce the User type: We introduce a
Usertype to represent the owner of todos (#17). - Establishing relationships:
Userneeds to ownTodos, so we set up a one-to-many relationship withTodoby adding atodosfield (#24). We also add auserfield toTodoto establish the reverse relationship (#13). - Establishing context: We need to know who is accessing the APIs. Therefore, we introduce
AuthContextwith theidandrolefields sourced from the incoming JWT token (#1-#4). - Securing todos: Since we want each
Todoto be accessed only by its owner, we express this usingself.user.id == AuthContext.id. Hereselfrefers to the current object, which is aTodo. We also added|| AuthContext.role == "admin"to allow admins to do anything (#8). - Securing users: The rule for
Useris even simpler: only admins can query or mutate users (#16). - Setting defaults: Notice the default value of the
useris set toAuthContext.id(#13). This allows the user to create a todo without explicitly specifying theuserargument to thecreateTodomutation (Exograph will automatically associate the current user with the created todo).This also ensures that the queries and mutations used in the single-user version will continue to work unchanged (where specifying the user wasn't even an option). We also set therolefield to"user"by default (#23).
Exploring the API
Let's try it out. Exograph's playground makes it easy to create authorization tokens for various users to test scenarios with various users.
- Open the playground at http://localhost:9876/graphql.
- Click on the
Authenticationsidebar on the left. - Fill in the JWT secret and the payload and hit the "Update Authorization Token" button.
{
  "role": "admin"
}
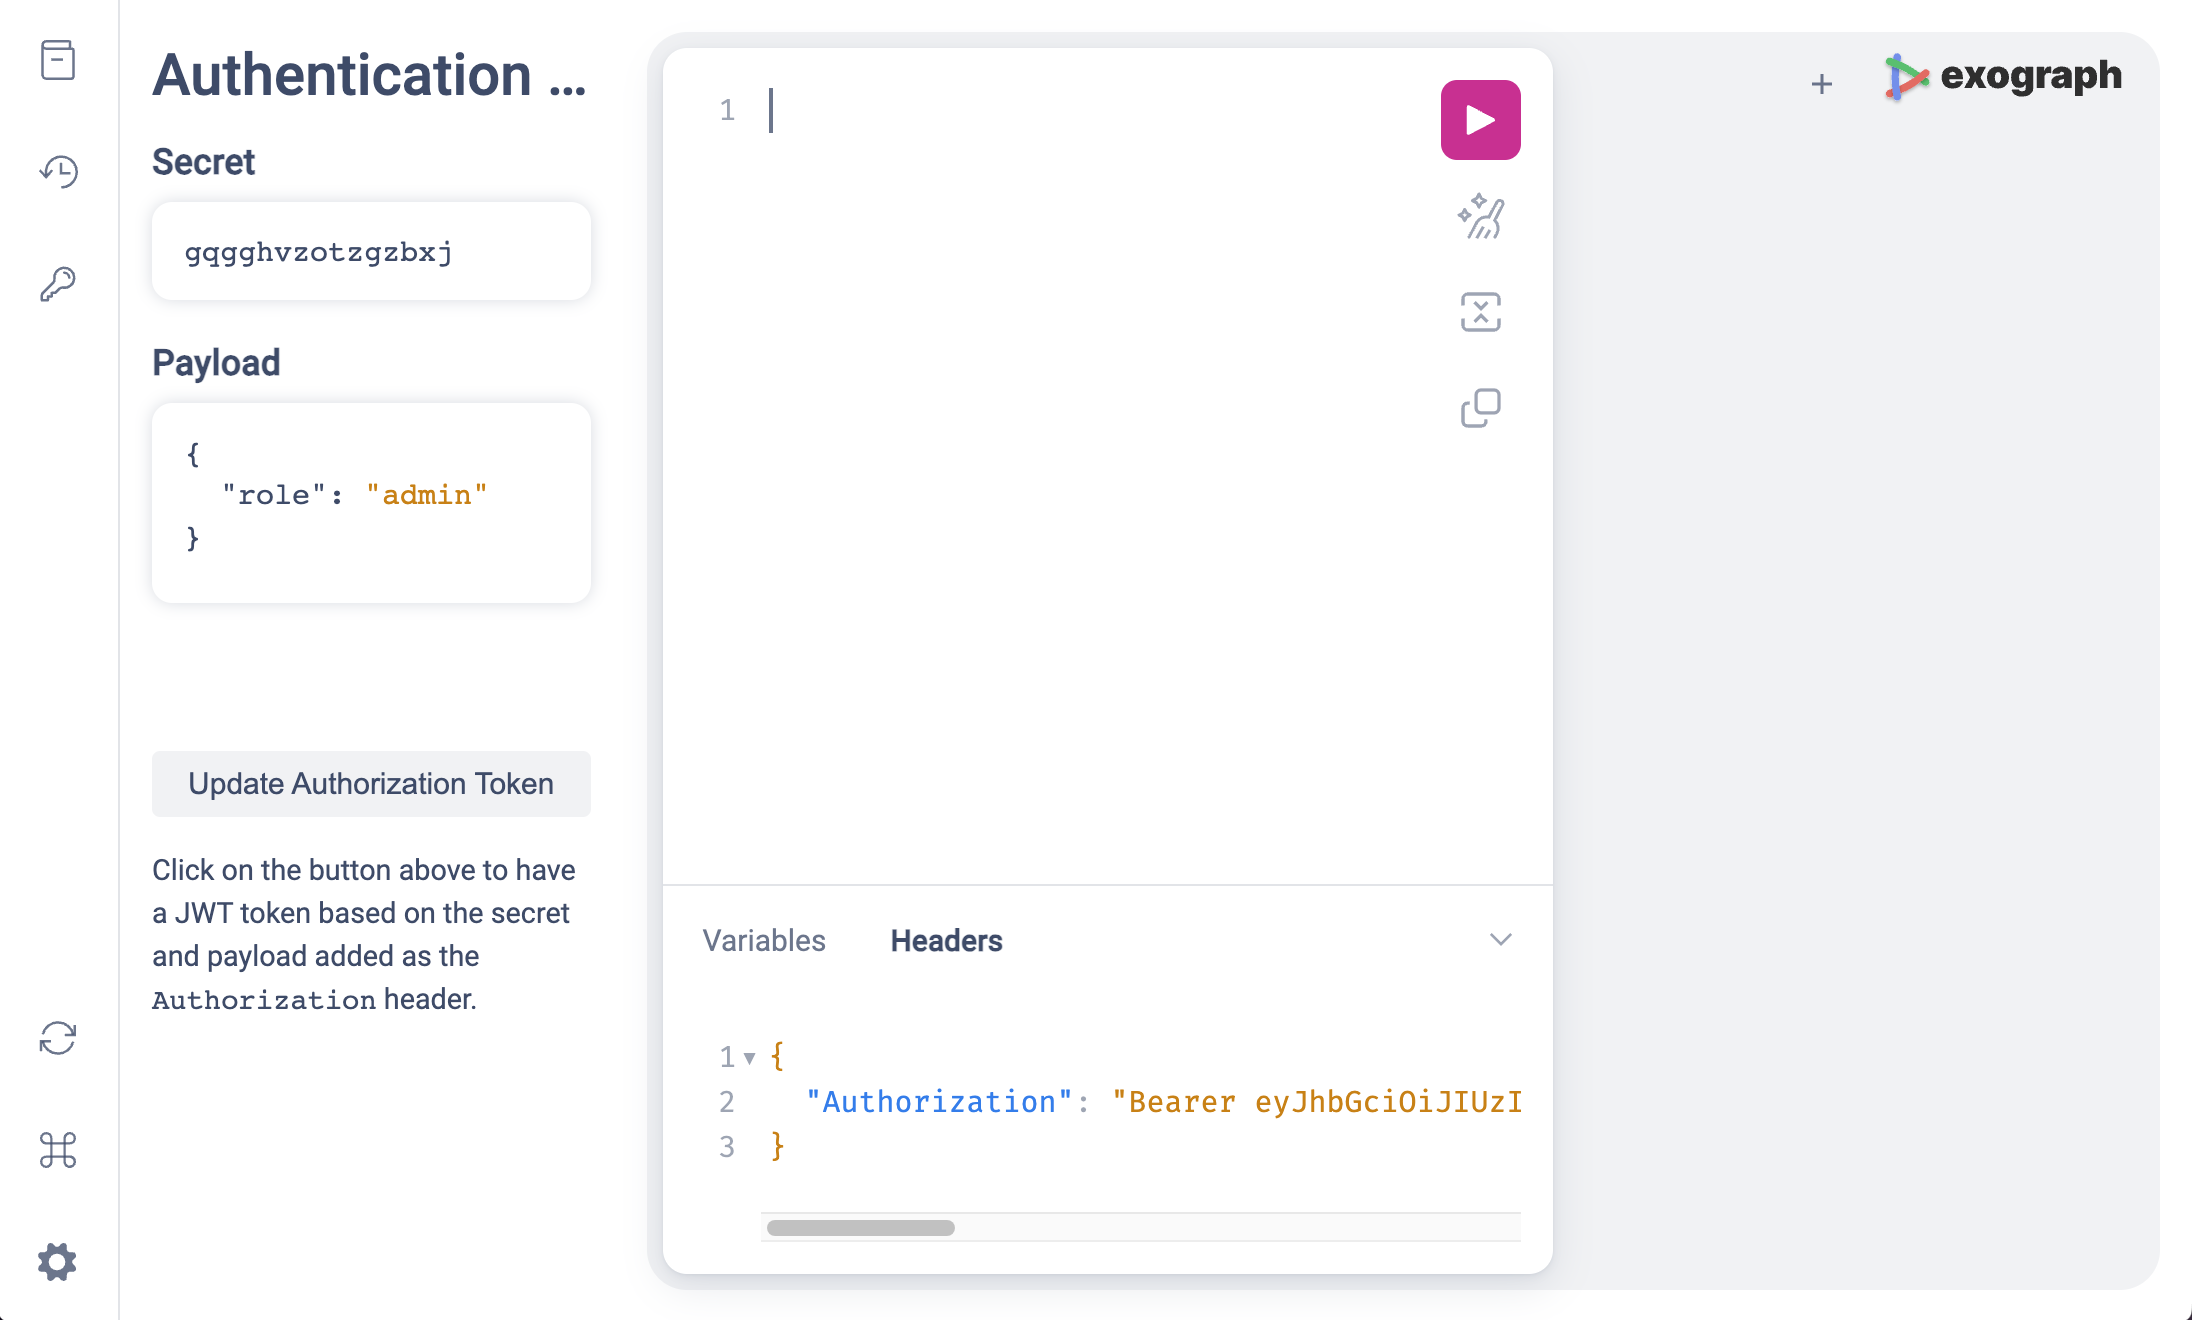
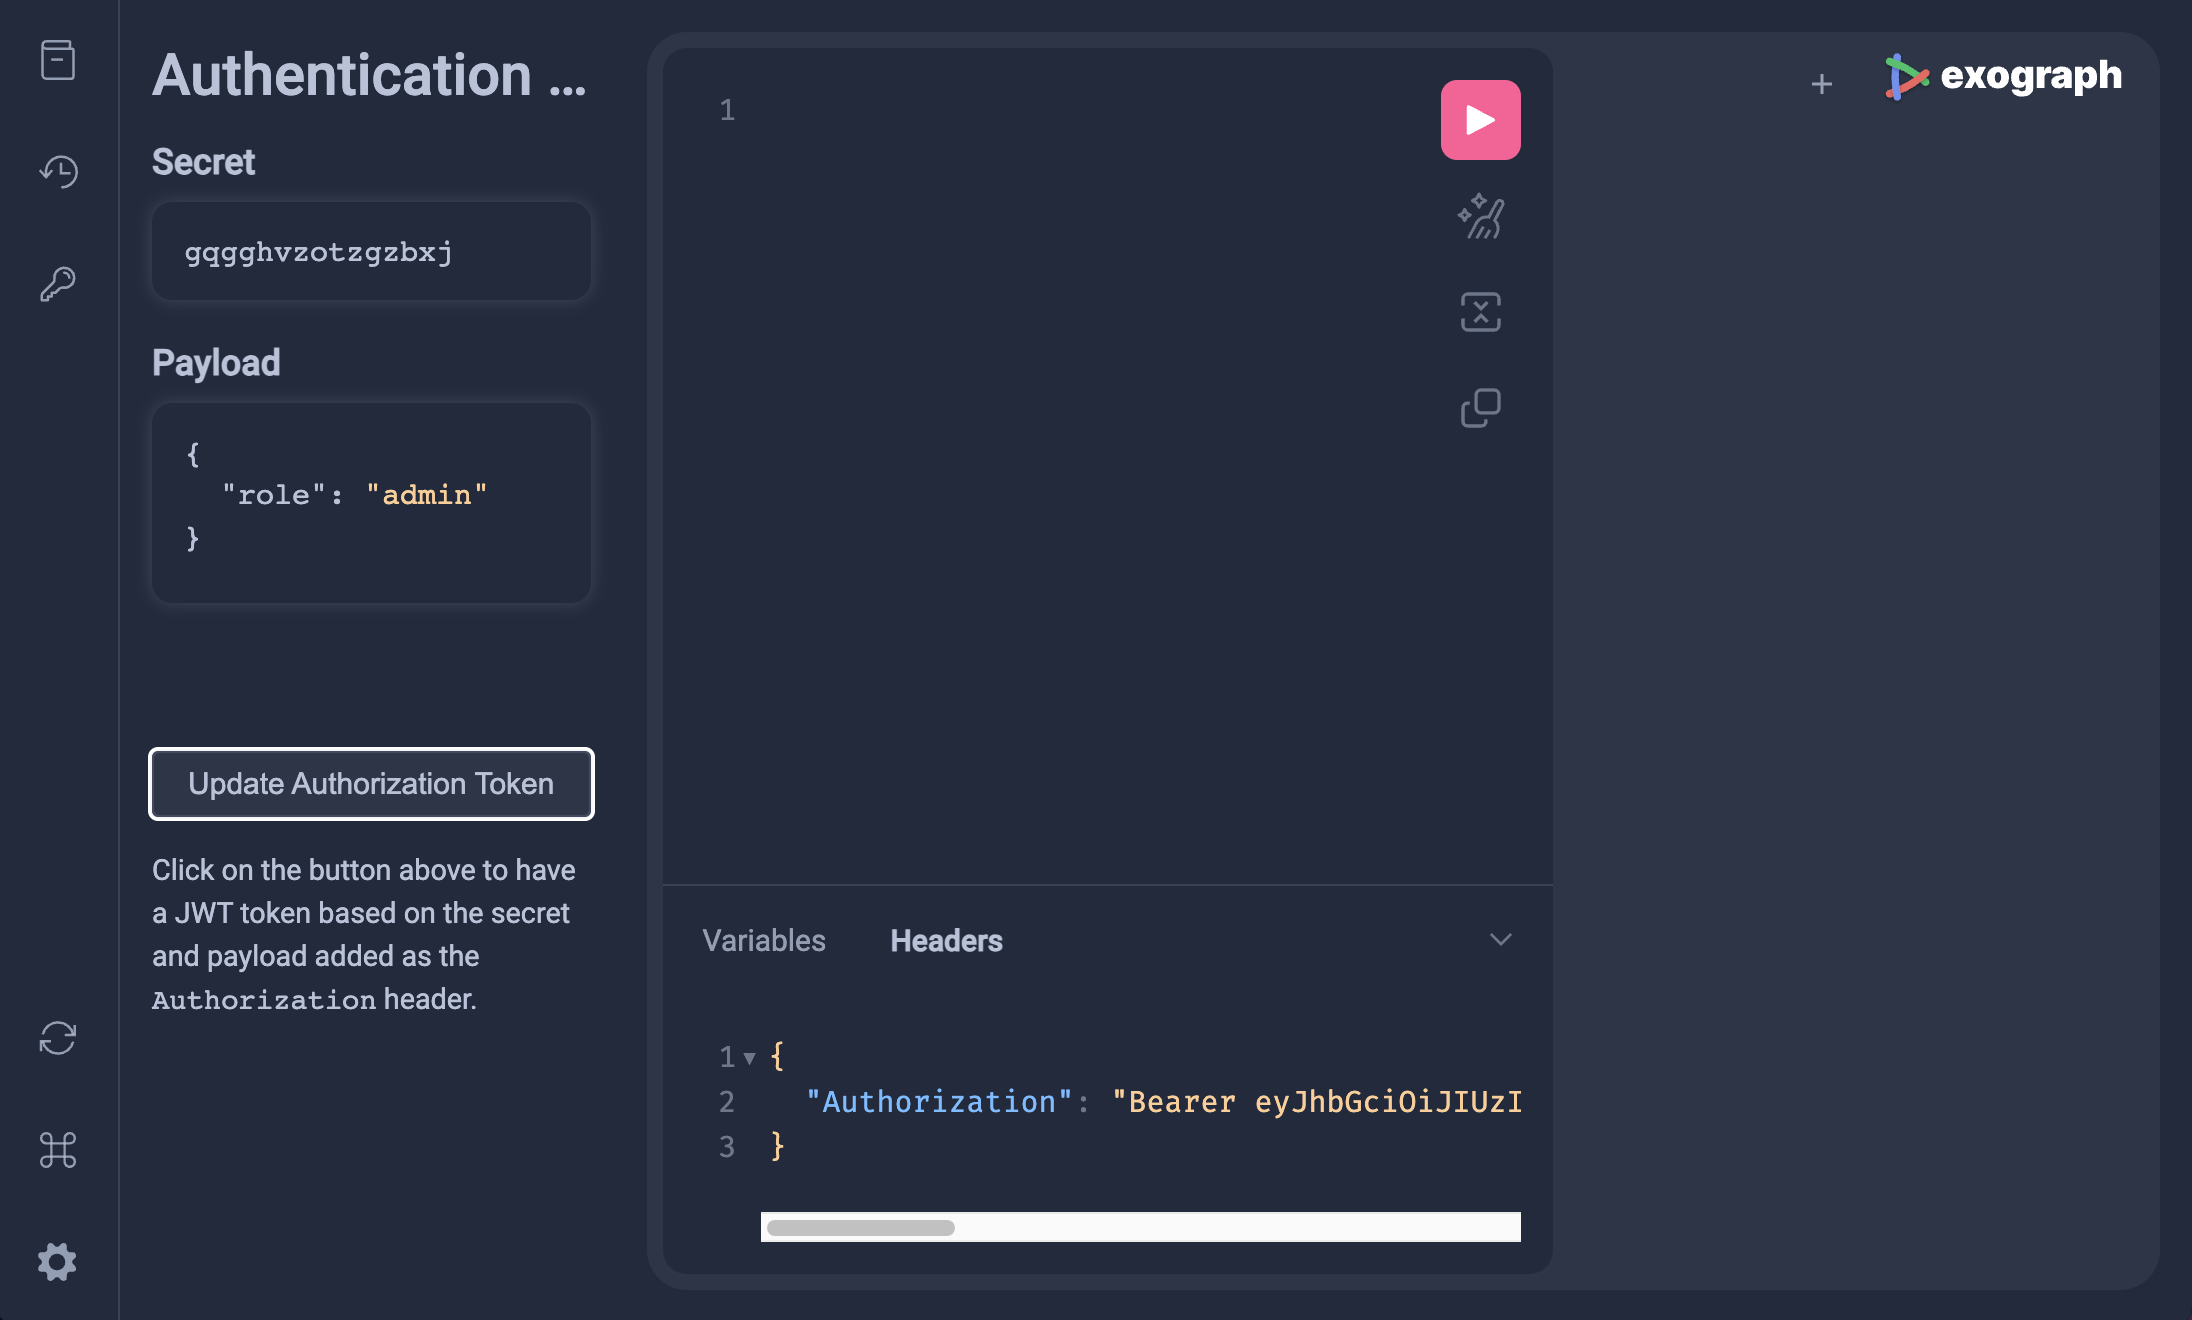
This will update the Authorization header with a JWT token. Let's create two users:
mutation {
  u1: createUser(
    data: {
      email: "[email protected]"
      firstName: "F1"
      lastName: "L1"
      profileImageUrl: "https://example.com/1.jpg"
    }
  ) {
    id
  }
  u2: createUser(
    data: {
      email: "[email protected]"
      firstName: "F2"
      lastName: "L2"
      profileImageUrl: "https://example.com/2.jpg"
    }
  ) {
    id
  }
}
Since we are running this as an admin, Exograph allows it. (Try updating the role field in the payload to user and see what happens.)
Now go back to the Authentication sidebar and update the payload:
{
  "sub": 1,
  "role": "user"
}
Now create a few todos for this user. Try to query all the todos (or completed/incomplete todos). You will see only the todos that you created.
Let's repeat the process for another user. Update the sub field in the payload to 2 and try the same operations, but buy items for a different breakfast to tell them apart. Maybe "Buy cereal", "Buy orange juice", and "Buy coffee"?
You can already see that the access control rules are working. Let's try to have one user update another user's todo. Still as user 2, try to update an todo created by user 1:
mutation updateTodo {
  updateTodo(id: 1, data: { title: "Don't buy", completed: true }) {
    id
    title
    completed
  }
}
Since the access control rule for Todo won't allow this operation, you will get back an empty response.
The accompanying code also includes tests using Exograph to ensure that the access control rules work as expected. You can run the tests with exo test.
Play around with the playground to see how the access control rules work. You will see that no one can query or mutate users except the admin. Users can query or mutate only their todos (admins can do anything). And all we needed to express this was a few lines of declarative code.
Conclusion
In this blog, we've explored the ease with which Exograph allows refining our application's access control rules as it scales. By adjusting a few lines, we can seamlessly adapt to new demands. Experimenting with these changes within the playground gives you confidence in your rules. Notably, the rules are clear and simple expressions. This makes it easy to reason about them and to communicate them with others.