Fortifying Exograph with Clerk

In a previous blog, our code used Google Identity for authentication. While such a solution is possible, taking care of details, such as supporting multiple social providers or password-less authentication, verifying emails, and refreshing/revoking tokens, can get tedious. This is where external authentication providers such as Clerk make life easier.
Exograph now supports Clerk as an authentication provider! Our integration goes beyond supporting JWKS authentication; it also makes it easy and fun to explore APIs by integrating Clerk's UI in Exograph's playground.
This blog will transform a todo app without authentication into a multi-user todo app by adding just four lines and modifying a single line of code! The accompanying source code includes a web frontend written in Next.js, Tailwind, Apollo GraphQL Client, and TypeScript.
A taste of Clerk integration
Let's start with the same first step as the previous blog, with the code generated by the exo new command for a single-user todo project:
@postgres
module TodoDatabase {
  @access(true)
  type Todo {
    @pk id: Int = autoIncrement()
    title: String
    completed: Boolean
  }
}
If you start the server using exo yolo, you can explore the API in the playground to query, create, update, and delete todos.
To make this a multi-user app, we associate each Todo with a user and ensure that a user can only access their todos through the following changes:
context AuthContext {
  @jwt("sub") id: String
}

@postgres
module TodoDatabase {
  @access(self.userId == AuthContext.id)
  type Todo {
    @pk id: Int = autoIncrement()
    title: String
    completed: Boolean
    userId: String = AuthContext.id
  }
}
That's all we need to change! Compare this to other approaches where you would have to change most SQL statements or update invocation methods of an underlying framework besides including boilerplate code to deal with JWT verification.
Let's see what we did:
- A new
AuthContextsources the user id from the JWT token'ssubclaim (which will be the same as Clerk's user id). The client will send the JWT token in theAuthorizationheader, and Exograph will verify it using the API URL provided by Clerk. - The
Todotype adds auserIdfield. This field defaults toAuthContext'sidvalue to let the client skip the user id when creating a todo. - The access control rule enforces that users may query and mutate
Todos only if theiruserIdmatchesAuthContext'sid.
In the previous blog, we also had the User type, but since Clerk deals with user management, we don't need that anymore.
Now that the backend is ready, let's explore the API.
Using the playground
In a typical setup, the client will authenticate and send the Authorization token with each request. But how can you explore the API in the playground? How can you get a JWT token to put in the Authorization header? Developers often copy and paste the JWT token from the frontend app into the playground, which is a tedious process, to say the least (and requires building at least some frontend). It becomes even more challenging with providers such as Clerk, where the token expires quickly (by default, in 60 seconds).
This is neither specific to GraphQL nor Clerk. The same issue arises with REST APIs, gRPC, etc., and any authentication mechanism, including roll-your-own.
Exograph integrates its playground with Clerk authentication (as well as roll-your-own, but that is not the focus of this blog). The playground includes the signing-in mechanism and automatically sends the Authorization header with the JWT for the signed-in user for each GraphQL request. In other words, the playground acts as an alternative frontend. You can now easily explore the API by, for example, signing in as different users and seeing how the access control rules work.
Let's try it out:
- Set up a Clerk project by following the instructions and note down the value for "Publishable key" and "JWT public key/JWKS URL" from the Clerk dashboard under the "API Keys" section.
- Start the Exograph server by specifying the OIDC URL as an environment variable. We will use the
yolocommand to start the server (you can also use thedevor production mode. See Exograph's documentation for more details).
EXO_OIDC_URL=https://<your-clerk-host>.clerk.accounts.dev exo yolo
- In the playground, click on the key icon in the middle of the screen. The first time you open it, it will ask for the "Publishable key" you noted earlier. You may specify the template id but don't need it for this application. If you want to change this information, you can do it through the "Configure Clerk" link in the sign-in dialog.
- You will see the sign-in dialog once you specify the publishable key.
- Once you sign in, you will see the user's profile picture near the key icon to indicate the currently signed-in user.
Try various queries and mutations. For example, create a todo:
mutation {
  createTodo(data: { title: "Buy milk", completed: true }) {
    id
    title
    completed
  }
}
Or query the todos:
query {
  todos {
    id
    title
    completed
  }
}
Please see the earlier blog for a list of queries and mutations to try.
Now log out and try the same queries and mutations. You will get an error when you try to create a todo (unauthenticated users can't create todos). You will also see that you don't see any todos when you query them (users can see only their todos). Login as another user; as you would expect, you won't see the todos created by the first user.
Using the frontend
Once you have explored the API, building a frontend using the same queries and mutations is easy. The accompanying source code is a Next.js app that allows creating todos, marking them as completed, and updating or deleting them.
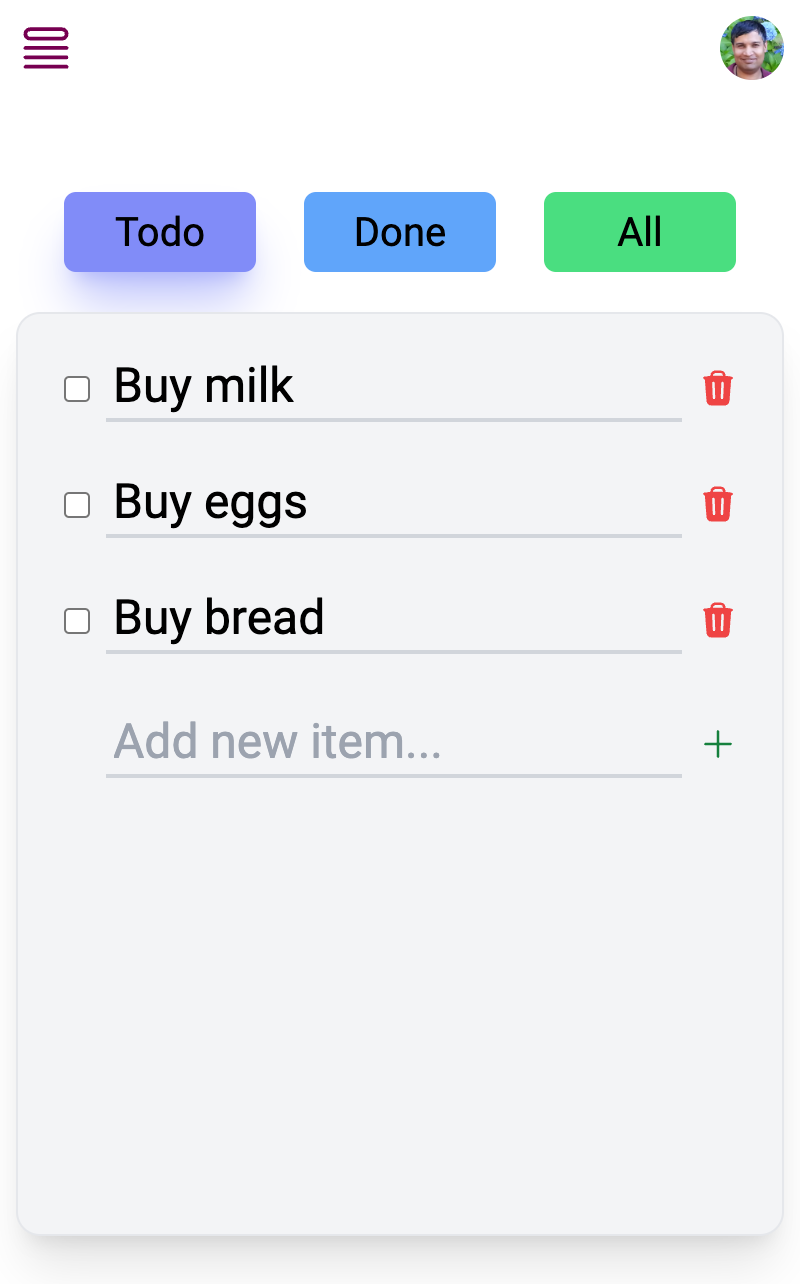

You can sign in as different users and see how the access control rule works (one user will not be able to see or change another user's todos).
Summary
Combining the declarative backend of Exograph with the authentication of Clerk was a breeze. It took us just four lines of code and a single-line modification to the model to make the todo app multi-user. The integration with Clerk's UI in the playground makes it easy to explore the API without building a frontend.
There is more that we didn't explore here, such as using custom templates. For example, we could use these to implement role-based access control to allow admins to see all todos. All we would have to change is add one line to the context (@jwt role: String) and modify another to add || AuthContext.role == "admin" to the access control rule! Such is the power of Exograph's declarative modeling and access control expressions. Please see the documentation for more details.
We would love to hear your feedback on this integration on our Discord.